My Adventures with the Terminal

Table of Contents
Intro #
Whether it’s working on my new site, helping to administer our Mastodon instance, or various other nerdy endeavours, I’ve been using the Terminal on MacOs a lot lately. Sometimes this is by necessity, where a certain action I want to take is accessible only via a terminal command, and sometimes it’s by choice: when you know what you’re doing, working in a terminal is fast.
Naturally, I’ve learned a few tips and tricks about the Terminal because of this that I thought I’d share here.
Customizing How the Terminal Looks #
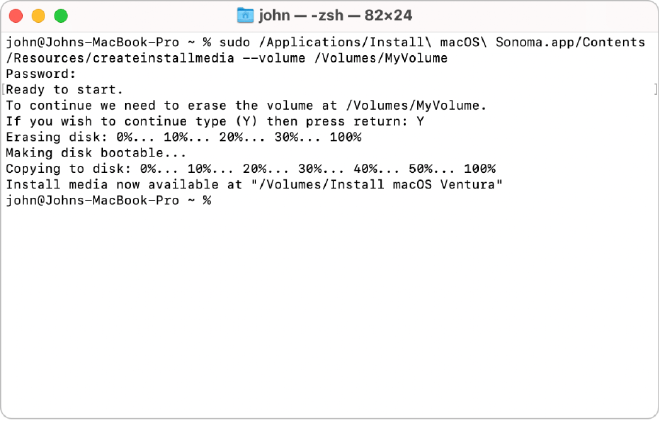
The first thing I’ve always done is customize the default terminal appearance in macOS. Here’s what it looks like out of the box:

I hate this so much. First, that the next is tiny. I can technically read it, but I don’t find it comfortable to read. Second, and I think this is because I’m an 80’s kid, but to me the Terminal should have black text with green letters. AS GOD INTENDED.
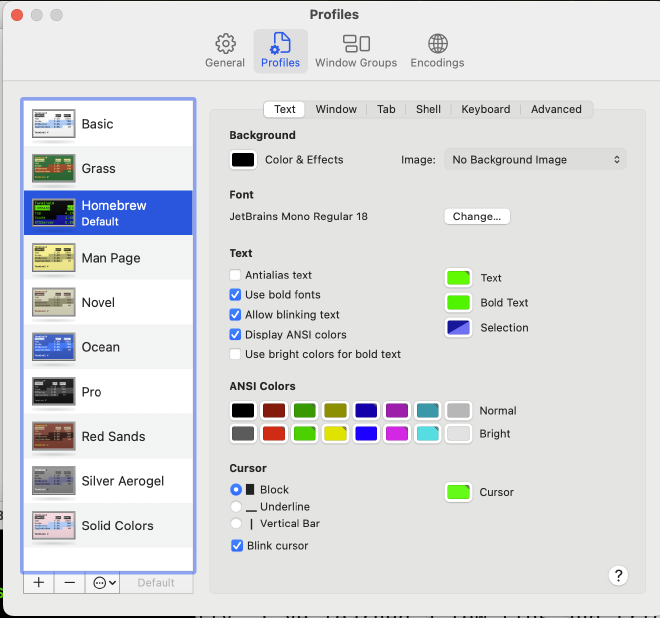
On any new Mac, then, the first place I go in Terminal is Settings->Appearance. I choose the “Homebrew” default appearance, with the JetBrains Mono Regular Regular font in 18 point.

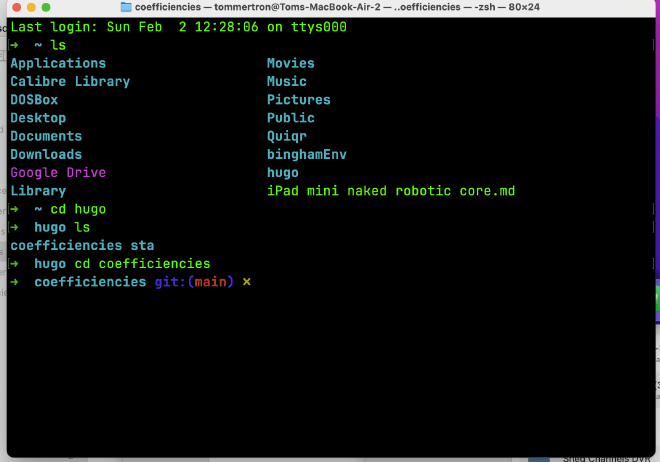
This was perfectly cromulent for me for a long time until I logged onto my friend’s server and noticed that it had different colours! Directories were a different colour, and if I was in a directory that had a git repository, it showed me that with the branch name and whether there were changes.
I talked to my friend who told me he did this through Oh My Zsh, a tool you can install into a ZSH-enabled terminal environment. I played around with the different themes for a minute, but settled on the default one. I might come back to customizing my theme more, but for me, having different colours for folders vs. files and the ability to quickly see my git repository’s status at a glance is remarkably helpful. There’s a billion other things Oh My Zsh can supposedly do, but these two things are all I use it for (for now).
Here’s my setup now:

Bonus: Terminal Tricks #
The Tab Key #
One of the best tips I learned about working in the terminal is the power of the Tab key. The Tab key is the Terminal’s version of auto-complete for files and directories. Instead of typing a full filename or directory in a command, start typing the first few letters and tab, and it will fill in the rest for you. If there are multiple matches for the string you typed, it shows you all the options so that you can continue typing until it hits a match.
The Tab auto-complete powers extend to navigating directories. Need to get to /etc/www/html/? Just type e, Tab, w, Tab, h, Tab, and Enter: you’re there. This drastically speeds up directory traversal.
Finding Directories #
As much as I like the Terminal, navigating an unfamiliar directory structure is easier in a GUI. I work with files in iCloud Drive a lot, and macOS presents it in a way that makes finding the right folder from the command line frustrating. Thankfully, macOS has a shortcut for this—you can drag a folder into the Terminal to get its path. Type cd , drop the folder in, hit Enter, and voilà, you’re there.
If you need to copy the path of that complicated directory structure you’re in, you can then use pwd to display the full path in the Terminal that you can copy and paste.
The Up Key #
When you work a lot in the terminal, you end up entering the same commands repeatedly, especially when you’re trying something new. Up will let you cycle through all your recent commands. Once the command pops up, you can edit it as needed.
Wrapping Up #
I recognize for an experienced developer, a lot of these tips are nothing new. But hopefully this is helpful for someone getting their feet wet with the Terminal. I’m planning on keeping this page up-to-date with more tips as I learn and experiment more.